Wednesday, May 14, 2014

Rendering tallow for soap

As discussed in my previous post, I've been making soap from scratch lately. A lot of soap! I kept coming across recipes for soaps using tallow, or rendered beef fat as a main ingredient. It's inexpensive and makes for a very hard bar of soap. It's also high in stearic acid, which is a key player in shaving soaps. Hubby likes to shave using shaving soap and a brush and in the past I'd made him shaving soap with a melt and pour base, adding clay to help the razor glide better. I wanted to see if making a cold precess soap with tallow would be an improvement.

That meant I had to make some tallow!

I started with a big bag of fat scraps from the market.
I started to try to trim the little bits, separating the meat from the fat, but quickly decided that was a phenomenal waste of my time! I had no plans for the microscopic bits of meat I was trimming off, except to give the dog a happy treat, and it was going to take hours!  Instead, I just dumped the whole mess into my crock pot. You can see that the crock pot is nearly full of scraps.
just starting
I put the lid on, turned it on and walked away. Actually, I went to bed, then got up, ran some errands, took the kids out and about, and generally forgot this was cooking.
starting to cook
 At the 12+ hour mark, it had reduced significantly, but there was still a fair bit of fat stuck to the meat.
12 hours 47 minutes
So I left it to cook for a little while longer. I had read that some people had to open the windows because of the bad smell, especially when rendering suet, which is the fat from around the kidneys, but this fat was from all over the cow and instead of smelling awful, smelled like roast beef! I felt a little bad for hubby. He was working from home and subjected to this smell all day with no hot roast beef dinner at the end!
12:47
 At about 16 hours it's almost done.
16 hours 35 minutes
There are still some big pieces that are holding some fat. If I'd been free, this might have been an ok time to dump and drain this, but I was busy so I left it a while longer!
16:35
Here we go, 18 hours, 21 minutes. This is about as done as it's going to get! At this point the bits of meat in the pot started to turn a dark brown and I worried that leaving it any longer might start to overheat the oil.

18 hours 21 minutes
There's not much left in the pot, just oil and browned bits of meat. The white bits that still look like fat are cartilage and aren't going to render out any more.
18:21
You can see how the level has dropped to about half the crock pot.
done!
 I poured the whole mess into a strainer lined with cheese cloth and let it drain into a pot.
my dog loves me so much right now
 After letting it drain by itself for a while, I folded up the cloth and gave it a squeeze.
squeeze
I put it between two plates, tipped it sideways, and gave it a gentle press to force out any remaining oil in the meat scraps. I will probably skip this step next time. I dirtied two plates and get very little oil out.
 I was left with a pot full of a clear golden liquid that had a very slight roast beefy smell.
clear, rendered, beef fat
I transferred this to a couple of containers on the scale to see how much was left. You should make sure your containers are heat tolerant or risk melting them like I did! The big container was fine,. The little storage container began to buckle and warp. Luckily, I just wanted to measure it and could pour it into another container after quickly snapping a picture!

About 5 and a half pounds of fat trimmings left about 2 and a half pounds of tallow.
2 and a half pounds of tallow
One of the great things about tallow is that so long as you keep it tightly sealed, it can sit on the shelf for months!  Mine didn't last nearly that long!  Up first was a batch of lemon poppyseed hand soap!  This is it, fresh out of the mold. Once saponified, there is absolutely no trace of the beefy smell. Just the natural smell of fresh soap, and in this case, some lemon essential oil!
lemon poppyseed soap loaf
This is it cut and cured for a few weeks. This bar also has coconut oil, castor oil and and olive oil, in a goats milk base. The poppy seeds and lemon peel granules make it scrubby. It's a great soap for the kitchen.
lemon poppyseed goats milk soap bar
Here's the shaving soap!  I used a 3 inch cylindrical mold to make pucks of this soap. This is a cedar and lime scented tallow shaving soap with French green clay added for slip. It also has shea butter, avocado oil, sunflower oil, coconut oil and castor oil.  I am eager for it to fully cure so I can see how it lathers!
cedar and lime shaving soap with green clay.
In the end, I paid $3.23 for the fat scraps and ended up with about 42 ounces of tallow. That's $0.0769 per ounce. Let's call it $0.08. That's nearly a third the price of my next cheapest ingredients, coconut and olive oil, which are both around $0.25/oz.  So far, I am impressed with these soaps. They are much harder than my other soaps, which should make them last longer. There's no weird smells and they lather nicely!

Monday, April 28, 2014

Mint Chocolate body scrub

Over the past few years, my husband has been making an effort to reduce the amount of "chemical" in his life. I know, I know, I already teased him about the word chemicals. Everything is chemicals. We know that, but I also know what he means.  He's been eating more locally grown, organic produce and grass fed meat. He's switched to toothpaste with fewer hard to pronounce ingredients. Things like that.

In an effort to help him know what's in the products he's using, I started making soap at home, from scratch. With the help of some lye calculators and a lot of internet help with recipes, troubleshooting  and moral support, I've made several bars of soap that have all been well received in our house.  This post, however, is not about soap! I currently have 2 tabletops covered with soap curing until it's ready to use so the last thing I needed was another batch of soap! That didn't stop me from perusing pintrest for new, interesting recipes while waiting for my kid at play rehearsal.

Recipes for soap tend to get mixed in with recipes for lip balms and lotions and other DIY bath and beauty products. One immediately caught my eye! A chocolate mint sugar body scrub!  Girl scout cookie season is over and we are sad to see our thin mints leave but now we can just bathe in them instead of eat them!

The original post and recipe is from Henry Happened and her photos are so much more creative and awesome looking than mine! 

Not her picture, just my sad camera photo!
I mixed up a batch. I made a few modifications, one being that I used half sunflower and half olive oil because I didn't have almond oil, and the other was using a plastic bag instead of a mixing bowl to contain all the thin-minty goodness. At first, the mixture didn't seem all that interesting and I wondered if I had missed some critical part of the recipe (which is hard, because the recipe is really simple but crazier things have happened!) I smushed it around to get it all mixed well, then added the oil and peppermint EO.  That's when magic happened!  The color changed and the texture changed and it started to look yummy!  When I opened the bag, the smell was fabulous!  I poured it into a plastic container I had hanging about.  I might have used some nail polish remover to scrub off the name of the gelati company but anyone that read this blog knows I'm not in it for that much effort! :)

The result is a delightful mixture of chocolate and mint and just enough oil to hold it together and make it easy to handle. I brought the jar up to my daughter who opened it, smelled it and ran to the shower to try it!

She emerged a little while later freshly scrubbed and raving about how she felt like she just covered herself in chocolate scented lotion.  Her skin is soft but not greasy and while the smell was great in the shower, it's not overpowering on her skin.  I have a feeling she's not going to surrender this and I may have to make another batch for MY shower!

For the full recipe, and much prettier pictures, please go to Henry Happened! If you're missing your thin mints, this is a way to get them back, at least in spirit, until next year!  If you do try it, be careful! It can make the tub slippery!  Use appropriate caution if your tub or shower gets slippery!

And check back soon for stories of soap and playing chemist in the kitchen!


Wednesday, March 19, 2014

The sewing machine

A while back I was doing some sewing, making a few baby gifts for some friends. My daughter was intrigued. I don't haul out the sewing machine often, so watching me sew was novel to her.  She wanted to learn, so I set her up with some scraps and got her started on a small project. Of course, this made her want to use my machine while I was still busy with my own projects which was making everything take longer. We needed a solution.

A few days later, I happened upon a battered bit of furniture at a local thrift shop. I recognized the cabinet immediately. Singer never had much variation in their sewing machine furniture!  I peeked inside and found a well loved, and long neglected sewing machine with no power cord. It was a "Fashion Mate 362" an amazing workhorse of a machine. Fashion Mates are often used in schools for Home Ec because they are affordable and easy to use, as well as extremely durable. What better machine for teaching a kid how to sew than a machine that is used all over to teach kids how to sew? In it's sad state, the thrift shop only wanted a few dollars for it.  Knowing old singers are nearly indestructible, I put it through its paces, moved all the knobs and dials, found only one sticking but was fairly sure I could fix it, and if the internal electronics were still good, all it would need is a foot pedal/power cord! If the electronics were shot, I was only out a few dollars and I got a fixer-upper table instead!

I snatched it right up!


The machine itself showed a lot of wear, scuffed paint from heavy use, but it was also really grimy. I imagine it belonged to someone that sewed a lot, thus the worn spots, then it stopped being useful, was moved into a kitchen and used as decoration. Cooking grease settled on all the surfaces of the machine hidden inside, and the top of the cabinet was used to hold plants. Plants that were over watered and damaged the lid.
Doesn't look too bad at first glance, but it was literally TACKY with grime!

Thursday, September 19, 2013

From the archives: Doggy Disposal

Dear GoodJoan, 

Is it appropriate to dispose of a dead pet (too large to flush) in your town trash pickup? We don't have a dead pet, just one of those burning questions! ;)


 If you're dealing with something small, like a gerbil or a parakeet, you can probably wrap it in paper or a trash bag and put it in your household trash and no one would know or care. Something larger, like a cat or dog would be harder to disguise as regular trash. Many landfills will accept dead animals as household solid waste, but your local trash pick up may not want to handle them. A phone call to your garbage service is in order. Some have certain rules for disposal of what may be a bio-hazard. Things like diapers and kitty litter, in my town, have to be double bagged and kept out of the regular trash.


If the animal is something small, like a hamster, chances are the pet owner is a child and in that case a proper funeral is in order! There should always be a procession and a burial followed by short stories about how the pet was well loved. If someone can find black veiling, all the better! Be sure to cover the grave with a few heavy rocks to keep other animals from disturbing Zippy's eternal slumber! Even if the owner is a grown up, many people chose to bury their pets nearby, in a favorite spot or have them cremated and sprinkle the ashes in the pet's favorite place.

Buddy aims to be the favorite.

If the animal in question is road kill, you can call your town public works division or animal shelter and ask them to remove the animal from the road. If you are a Good Samaritan and notice an animal that is likely someone's pet, call the humane society first and report the animal and it's description, as best you can give. (ie "flat" is not helpful, but "a black and white with a pink collar" could rule out many lost pets for an owner that was searching.) A worried pet owner may not like the news that fluffy was found in the road, but knowing for sure what happened is better than wondering and driving to shelters all over hoping to find her. Even if it's not a pet, and something less pleasant like a skunk or a possum, the people who live and drive near it will be glad that it's picked up promptly.

Boomer pretends to be roadkill.

If the critter is larger and not as easily dropped in the trash you have a few options. You can wrap the body up and drive it to your local landfill yourself and pay whatever the fee is for the trunk full you're toting. You can call and ask your local trash pick up and possibly pay a service charge for removal of the animal. You can take the animal, in a plastic bag, to a local vet and pay a fee for them to dispose of the body. If you want the animal cremated and the ashes returned to you, label the bag with your name. You can also donate the critter to science in the way of a high school science teacher, vet school or taxidermist. The thought of Fido being dissected or stuffed isn't exactly pleasant but you don't care, you were just going to throw him in the trash anyway!!

ShopCat is not amused!
(**Please note all animals depicted were, at the time of the photo, alive and well and unharmed. No critters were harmed in the making of this blog post!**)

Wednesday, September 4, 2013

From the archives. "My MIL won't babyproof!"

Dear Goodjoan.

My mother-in-law's house is not baby proofed at all. My 1 year old son is her fourth grandchild and she has never bothered. I keep a close eye on him when we are there to make sure he doesn't hurt himself or wreck anything but she leaves things on the coffee table and end tables, like candles, vases of flowers and knickknacks, etc. Is it my responsibility to clean up after messes he makes, or if he breaks something? Should I run around and put stuff up out of his reach as soon as we get there, or is that her responsibility?

I know this is a difficult position because you don't want your son to get hurt, nor do you want any of the bric-a-brac getting broken but you'd also like to sit down for a moment during your visit! My advice here is different than if you were just popping over to a childless friends house because I am assuming your MIL's house is someplace you go often and someplace your son's needs should be met to some degree. If your MIL hasn't changed anything yet, she probably feels like it's your responsibility to teach your son to not touch things, rather than her job to protect him from things that are dangerous or fragile. Unfortunately, kids don't start developing what we'd call self-control until they are 2.5 or older! He is incapable right now of NOT touching those things!

 First, start with a phone call before you visit. "Mom, we are coming over tomorrow and I wanted to ask you ahead of time to maybe pickup or put away any fragile things from where Baby can reach them. We are trying to teach him to be respectful and gentle with things but he's still so little that he doesn't really understand that not everything is a baby toy. You have such beautiful things in your home that I would be heartbroken if he accidentally broke something. He's also gotten very curious since he started walking and I know you wouldn't want him to pull a flower vase onto his head or anything like that, that might hurt him. Gosh, I had no idea babies were so fast! You know what? The other day I was at a friends house and I ended up leaving early and not getting to visit very long because her house wasn't baby proofed and the baby was into Everything and I just couldn't keep up!"

Then, when you do arrive, start redecorating. Bring adjustable gates with you and block off hallways or stairs, or trap Baby in one room with you. If necessary for you in-laws, bring the swinging style gates that they can open and walk through. Bring a hand full of outlet covers, they are cheap, and stick them in the outlets as you see them or as your son discovers them. Leave them there when you leave. If there are cabinets he likes, bring some kitchen cabinet locks that go around the door handles. When you have a safe area staked out for him, walk around yourself and pick up anything you KNOW is going to get manhandled by the baby. Flower vases, ceramic birds, and remote controls, whatever and move them to higher shelves or to another room. If your MIL is uncomfortable with you moving things, or asks you to stop, leave them there but FREAK OUT every time he touches one. I don't mean just lean over and take it away, I mean Yelp like someone poked you with a stick, jump up in a flurry of waving arms, gently take the item from the baby (don't yell at the baby or make him think he's doing anything wrong if he's not!) and run with wide eyes to your MIL, hand the item to her and proclaim horrifically "This almost got BROKEN!!" She'll probably start picking up before your visits just so you won't act like such a nutcase anymore!

If she continues to leave breakables around you can do one of two things, let him go wild and break anything he can get his hands on, being careful that he doesn't hurt himself and she doesn't scold him for what is really her own error, or you can remove him from a few things and then just say "I'm sorry, but he's getting into everything and I can't even sit down. We're going to need to go now because he's only going to get more frustrated and frustrating or something's going to get broken." Then pack up and go home. If it's important to your MIL that you come and have fun and stay for a while, she will start being more of a partner in caring for your son's safety and less of a liability. Certainly, as Baby gets older it's important to teach him that the rules are different in Grandma's house and some things aren't for touching. Kids do understand that and will act accordingly, but they have to be old enough to grasp the concept of personal safety and being gentle first and you're not there yet! 

Friday, August 30, 2013

The Pickle Problem

When I first moved to Georgia, I knew I would miss some things about New England, the smell of crisp fall leaves, snow, my family, the house I grew up in. You know, all the stuff you're supposed to miss.  Turns out, much of that was over rated! I don't miss snow at all!  Especially slush puddles that hide near your car door, waiting to leap into your dress shoes at the first opportunity.  I don't miss I-95 and it's potholes one bit. The beach, eh, it was ok but I'm far too fair skinned to really need to be there frequently.  Plus, sand is scratchy.

What has taken me by surprise over the years is the stuff I never thought I'd miss, but realize when I see it again that I missed it terribly!  Saltbox houses and old barns with fields surrounded by endless stone walls rank high on this list.  Another top contender- Pickles.  Pickles, like biscuits, spaghetti sauce, pizza and other regional specialties and family recipes are one of those things that you develop a taste for as a kid and spend the rest of your life trying to find the recipe that tastes just like Mom's, or just like Vinnie's or just like what you had when you were 8.  When you relocate to a different part of the country, it's even harder to find something that is at least, close enough.  In Atlanta, I can find over a dozen kinds of pickles, none of them are the fat, crunch, kosher half sour pickles my dad used to fish out of the barrel at the Hickory Farms store in the mall and share with me as we waited on my mom to finish shopping. I didn't even realize how much I loved those pickles until I went without them for so long!

Shortly before my wedding, a little bagel shop opened up in my college town. They got terrible reviews. The bagels were hard, leathery, impossible to chew.  The toppings were odd, What's a lox?  They were AWESOME!  They were exactly like the bagels we'd buy in Grand Central Station and eat for the entire half hour it would take us to get home on the train!  The locals here were used to squishy Lenders bagels from the grocery store. They had no idea! Soon-to-be-hubby and I ate there one day and he ordered a sandwich. It came with a pickle wedge that he offered to me. Expecting the typical vinegary dill pickle, I was at first surprised by the salty, garlic deliciousness that I tasted.  Then I realized what I had!  My eyes widened and I started to clap my hands and stomp my feet. I think I made audible YUMMY noises. Hubby thought I was having a stroke. I handed him the pickle and told him to try it.  He did and he made a face and said it tasted weird.  I ran to the counter and asked if I could buy more pickles.  A very confused clerk said "Um, no, they aren't for sale. The owner has them flown in every week from New York." She thought they tasted weird too. She said most people try them and throw them out!  Oh my, what a waste of good pickles!  Sadly, but not unexpectedly, the bagel shop didn't last and my small lifeline to half sour pickles was gone. I could never find them in a store and any reference to home pickle making I could find in the library was only for vinegar pickles. Half sour pickles are not 'pickled' in the 'soaked in vinegar' sense of the word, but rather are fermented in brine so they aren't listed in typical canning and storing type cookbooks.  So sad. I gave up on finding those pickles again.

Fortunately, a few years later this nifty research tool became available...the internet!  I found several recipe variations to my beloved half sours and tried a few. As I decided what I did and didn't like about each, I tweaked the recipes into one.  This is the one I use.


My highly technical recipe.

And these are the things you need- A pitcher of room temperature water, a box of salt, pickling spices, garlic, a jar to ferment the pickles in and some cucumbers. If I was a more organized blogger, all of those things would be in the picture :)

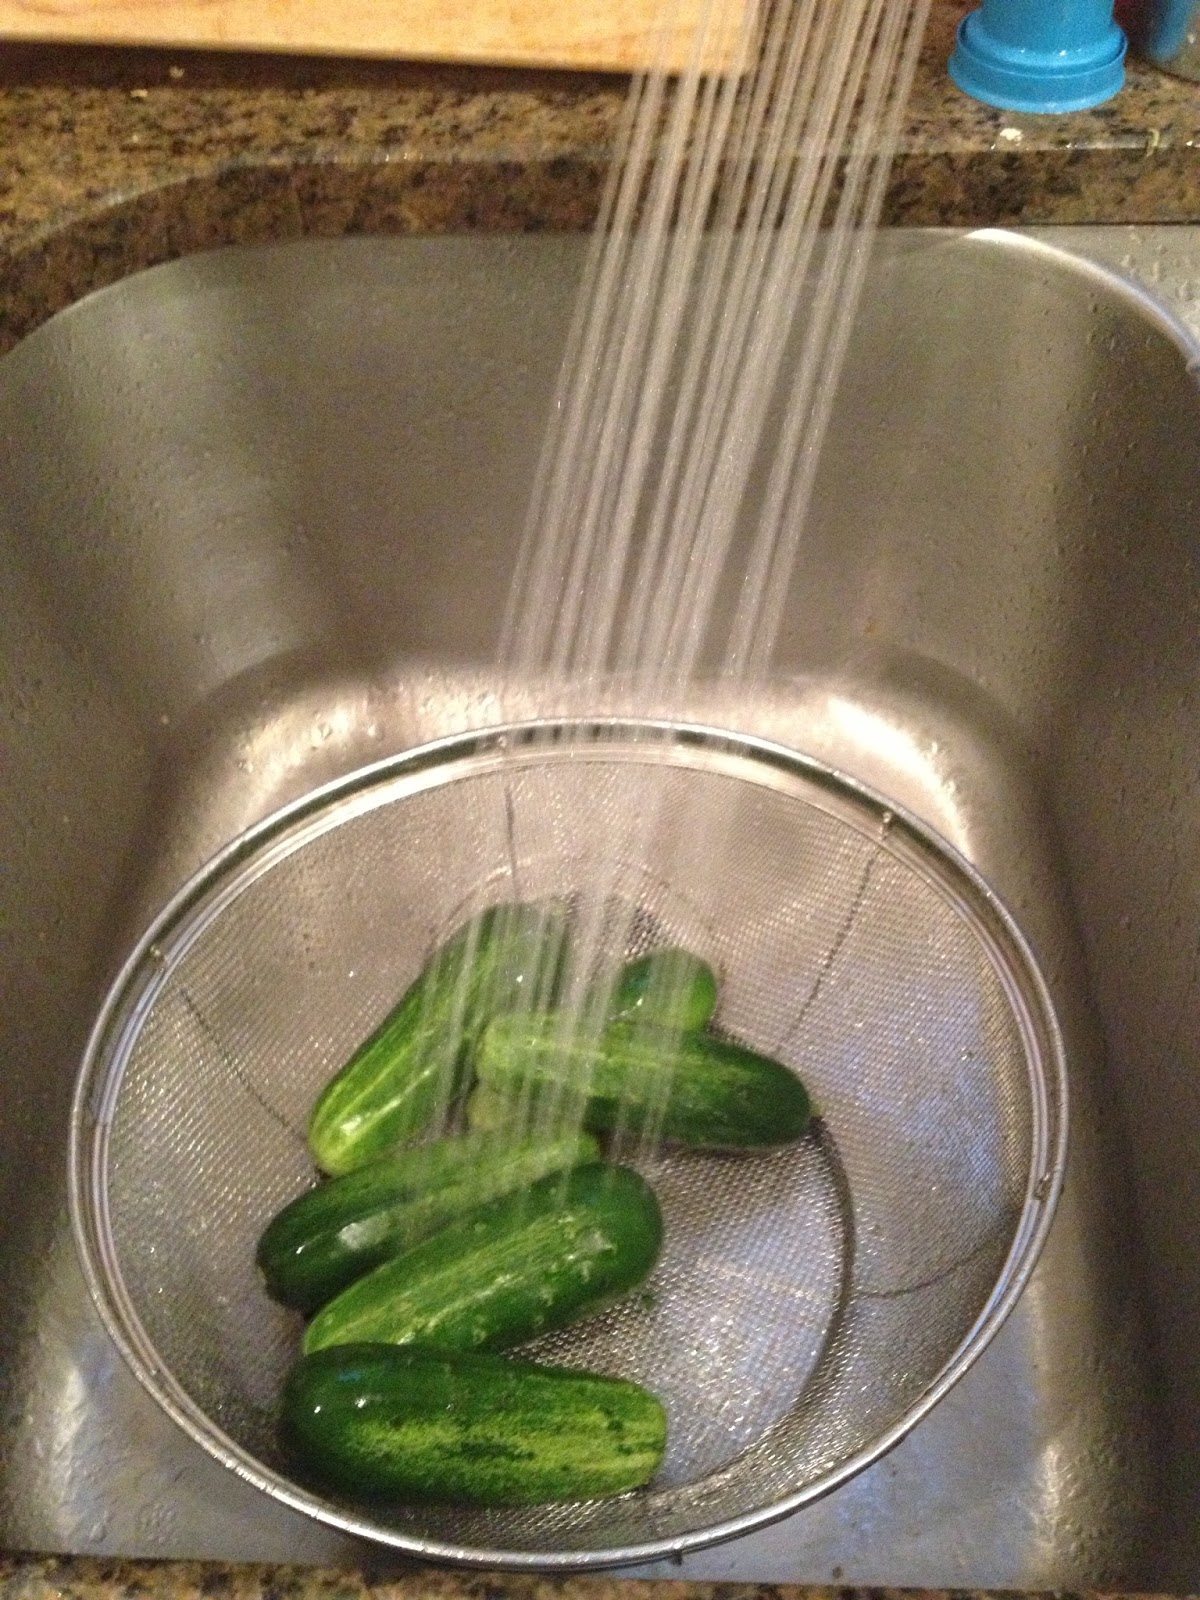
Rinse the cucumbers in cool water. Nothing special here, you just want to rinse off any loose dirt. Pickling cukes will work best, but since they only soak for a sort time, larger salad type cukes will work too but the end result will be softer than the smaller, pickling variety.
Dissolve 1/4c of salt (pickling, kosher, coarse, ice cream, whatever is cheapest.) into 8 cups of room temperature water.  If you want to be super special, let the water sit out overnight to let the chlorine dissipate, or use filtered water. All those goodies they put in the water is to kill bacteria, and we're trying to grown bacteria so getting them out helps the process happen faster. For the same reason, hot or cold water can slow fermentation, just go with room temp.

Put your spices (2T) and garlic (5-6 cloves) into the container you're going to use to ferment the pickles. Normally, I use fresh garlic, peeled and smashed with the side of a knife, but I was all out and I really wanted pickles so I used the oil packed. Also, these are just store brand pickling spices. I think these have too much clove so I just pick out about 2/3 of them before adding to the container. If you absolutely must have DILL in your pickles, add a spring or two of fresh, whole dill now. Don't use the really fine, powdery,  dried stuff, or if you have to, put it in a muslin bag first so it doesn't stick to the pickles.
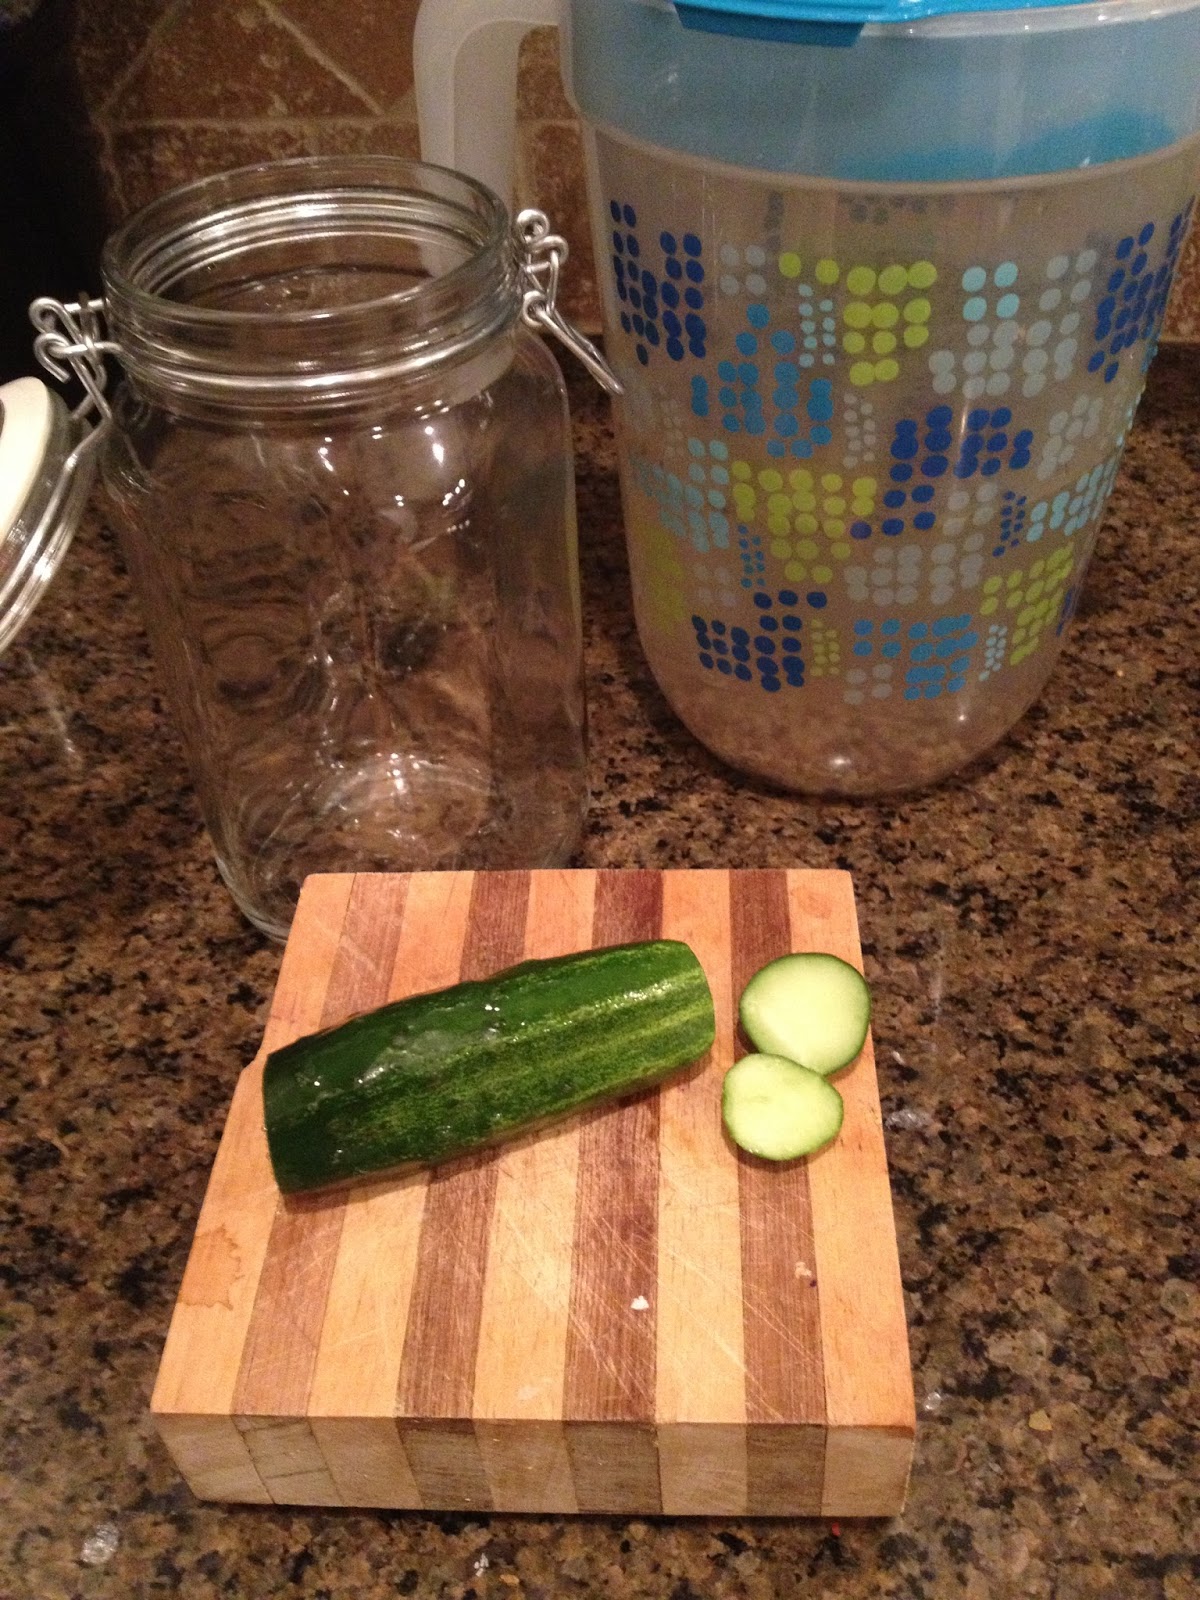
Cut the blossom ends off the pickles. I hate biting into a bit of stem so I cut off the stem ends as well. This also makes them fit nicely in the jar!  This is the time to decide if you want whole pickles, or slices or wedges. Cut them however you want them.  Whole will stay crisp longer but if I know I'm going to use them up fast, I sometimes cut them in 4ths.
 
Goof alert! I usually mix all my brine and spices into a large crock (below) so I threw everything into the pitcher for this tutorial.  This was my first run with these smaller jars and I didn't use all the brine, leaving me to scoop and scrape the garlic out of the pitcher and into the jar after the fact. You can see the spices in the brine in the pitcher. Ignore that, put your spices in the jar!  The smaller jar probably would have been fine with half the spices and garlic, but having twice as much didn't hurt.  Luckily, we love garlic in our house! If you don't have a mason jar or a big crock, any large plastic or glass container will work, a big cookie jar, or a food grade bucket from a fast food joint. A wide top is useful, so you can more easily submerge the cucumbers. This glass crock was under $10. I think it came from Old Time Pottery or Garden Ridge. 

Pack the cucumbers into the jar. It helps if you can wedge them in enough that they don't float around too much, but you want them loose enough that the brine can get in and around all the cukes.
Right before my craving for pickles, my hubby bought a set of "Pickl-it" fermenting jars. I figured this was a great opportunity to try them out. They come with a glass dunk'r, to hold the food under the brine (visible below) and a nifty airlock to keep anything unwanted out of the jar, including oxygen, while allowing fermentation gasses to bubble off.  In the past, I've had issues with yeast or other less desirable things growing in my pickles, with the pickl-it airlock, I had none of that!  (and they didn't pay me to say that, or give me swag...though I'm not opposed to swag!)

Pour the brine over the cucumbers, covering completely. If you don't have these fancy jars, you can use a smaller dish to hold the cukes down, or a baggie filled with brine.  In my big crock above, I use a plastic needlepoint mesh cut to fit just inside the top, with a small plate or ramekin perched on top of it to hold it all down.
Leave your jar in a room temperature place, out of direct sunlight and away from extreme temperatures, for at least 3 days. The water will get cloudy, even downright murky!  There will be little bubbles. There may even be mold on top. If so, just scoop it off with a spoon. If you aren't used to fermenting your own food, it may look a little scary.  I promise you, it's ok!  These pickles are actually quite good for you!  They do wonders for your intestinal flora!  If you're scared, you can read up at the extension service, or any of the MANY internet sources about fermented foods to be sure you're doing it right. If you're not sure, or the whole thing looks like it's gone way off, or smells way off, by all means toss them and start over. This is supposed to be fun, not give you a belly ache!
After 3 days, move the jar to the fridge. (with the pickl-it, you can remove the airlock and put in the rubber stopper) Give the new pickles a little time to get cold, then dig in!  There are no more pictures because this batch didn't last long enough!  Once they hit the fridge, hubby, who has since developed a taste for the briny beauties, and I devoured them. You can let them sit longer, and they will get more and more sour. In a week or 2, depending on the weather, you'll have full sour pickles.  This is another reason these are so hard to find, the shelf life is so short! Both hubby and a dear friend of mine who knew my plight eventually found a commercial jarred half sour pickle, but they only pop up in stores briefly and then are gone again. It's easier to just make your own!

Do you have a favorite kind of pickle?  Is there a recipe that you grew up with that you've been trying to replicate as an adult? 

Friday, August 9, 2013

Let's revisit- Foster Parent?

2 years ago I posted a story about being asked if I was a foster parent.  I'd been asked so many similar questions (do you do daycare? Are they ALL yours?) that I was curious if it was because of the number of kids I had with me (I only have 4!)  or if there was something about my kids, or my demeanor that suggested we weren't a family. I heard back from other moms of many kids that the daycare thing was almost universal.  Apparently, any more than 2 kids with you at one time gets those comments!  Is more than 2 really that odd?

Similarly, any mom pushing a double stroller is asked "are they twins?" even if the kids are an infant and a toddler!

A few weeks after I was asked if I was a foster mom, I ran into the young man that had inquired.  I asked him why he thought I might have been a foster parent, and not just mom.  He stammered a bit and said "Um, because you always come in with different kids!  One day you came in and one of the kids with you wasn't the same race. The kid didn't look like he could have been even half yours, so I thought maybe you were a foster mom.  My mom used to foster, so I thought it was kinda neat!"  I had to think for a bit and I guess he must have seen my kids playing on the playground with some of their friends.   My kids certainly do have friends all over the spectrum of skin color and race, so the odds of him seeing them playing together were good.  We talked for a while about his mom and what it was like for him growing up with real siblings and foster siblings. I left feeling grateful that I *only* had 4 kids with me, and flattered that he'd asked because he thought I was that cool, and less concerned that he asked because he thought I was weird!  :)